Madame Beauty
Why is my electric brush cleaner not spinning? The answer is often simpler than a failed motor. A jammed brush, tangled hair, weak battery, blocked gear, or loose connection can stop the head within seconds. You may hear a faint hum, feel a short vibration, or notice the brush moving only after manual assistance. Those small details matter.
Repair is also an environmental decision. The Global E-waste Monitor 2024 reports that the world generated 62 million tonnes of electronic waste in 2022, while only 22.3% was formally collected and recycled. Checking a cleaner before replacing it can reduce unnecessary waste. The report comes from the United Nations Institute for Training and Research and the International Telecommunication Union. It does not focus on brush cleaners, but its warning applies to small powered appliances.
Repair advocate and iFixit CEO Kyle Wiens has said, “If you can’t open it, you don’t own it.” That idea encourages careful inspection, not reckless disassembly. Start with the brush head, charging contacts, power switch, and visible debris. Unplug the device before removing trapped fibers. Water near the motor can create a second problem.
This guide explains seven practical reasons your cleaner may not spin. Some fixes take less than a minute. Others reveal a worn gear or failing battery. I have to admit that blaming the motor first is an easy mistake. A cleaner can look broken while its brush is simply overloaded. If burning smells, swelling, or damaged insulation appear, stop testing and seek authorized service.
Confirm that the wall outlet works with another small appliance. Examine the cable for cuts, loose sections, or unusual heat. A weak connection may power the indicator light without driving the motor. If the cleaner uses batteries, remove and reinstall them carefully. I once blamed the motor too quickly. The real problem was a loose charging plug.
Place the cleaner correctly on its charging base, then watch the indicator light. Some devices need several hours before reaching usable power. Clean dry contact points with a soft cloth. Moisture, soap residue, or dust can interrupt charging. A full light is not always proof of a healthy battery. Try another compatible outlet, but avoid forcing the connector.
Press the power button once, then wait briefly. Some cleaners require a longer press or a second press for rotation. Check whether a safety lock, cover sensor, or travel mode is active. If the button feels sticky, stop using the cleaner. Do not open the sealed housing without proper training. A service technician should inspect repeated clicking, burning smells, or silent operation after confirmed charging.
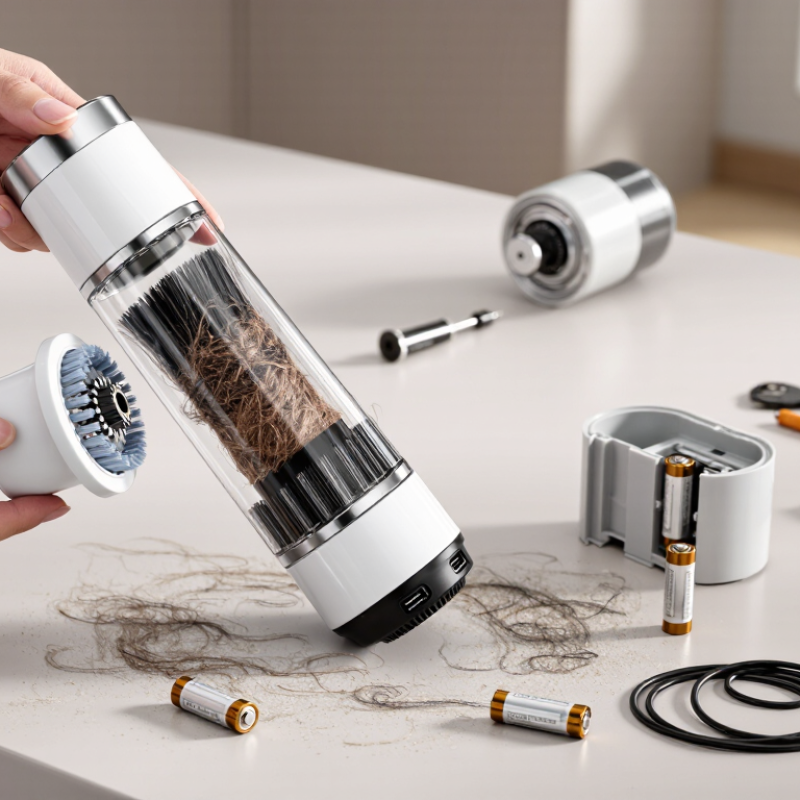
Tip 1: Remove the brush head before testing the motor. Human hair can wrap around the spindle like fine thread. The American Academy of Dermatology reports that people commonly shed 50 to 100 hairs daily. Some of those hairs eventually reach cleaning tools. Check the bristle base, axle, and small grooves under bright light.
Tip 2: Pull debris away gently with tweezers, not a sharp blade. Wipe the spindle with a dry cotton swab, then remove compacted dirt with a soft, unused toothbrush. Moist residue can act like glue. A 2023 report from the International Facility Management Association highlights that routine inspection helps maintain equipment reliability, although household tools receive less attention than commercial equipment.
Tip 3: Let the head dry completely before reconnecting it. Then rotate the brush manually. It should move smoothly, without clicking or resistance. If it still sticks, inspect the attachment socket for grit or dried cleaner. The U.S. Consumer Product Safety Commission repeatedly advises following product instructions and stopping use when equipment behaves unusually. That advice sounds obvious, but it is easy to ignore.
I once blamed the battery too quickly. The real problem was a narrow hair ring beneath the head. Clean the hidden areas, not only the visible bristles.
7 Tips Why Is My Electric Brush Cleaner Not Spinning?
When an electric brush cleaner stops spinning, check the brush head before blaming the motor. In routine appliance checks, an incorrectly fitted head is a common cause. Turn off the cleaner and remove the head gently. Inspect the connector, shaft, and locking groove for trapped hair or dried residue. Even a small buildup can prevent full engagement.
Tip: Confirm the Brush Head Is Installed Correctly
Align the brush head with the drive shaft. Press it down until it sits evenly and feels secure. Some models require a slight twist before the head locks. Do not force it. A tilted head may wobble, scrape the housing, or remain completely still. Try lifting it slightly after installation; it should not come loose easily. I once overlooked a shallow groove filled with soap film. Cleaning it solved the problem, although I initially suspected a weak battery.
Tip: Test the Connection Carefully
After reinstalling the head, run the cleaner briefly with the brush facing away from you. Watch for smooth rotation and unusual clicking. If the motor sounds normal but the head does not move, the connection may still be incomplete. Remove the head again and inspect both contact points. A damaged shaft, cracked plastic, or worn locking tab needs professional assessment. Avoid adding oil unless the manual specifically permits it. Oil can trap dust and create another problem.
Confirm the brush head is installed correctly before checking power, battery, or internal parts.
The chart ranks seven practical checks from highest to lowest priority. Start by removing and reinstalling the brush head until it locks securely, then inspect debris, charging, the power switch, safety-lock conditions, water exposure, and possible mechanical damage. The scores indicate troubleshooting priority, not brand-specific failure rates.
Unplug the cleaner and remove its battery before checking anything. Examine the brush head for hair, dried detergent, or grit around the spindle. A blocked spindle can make a healthy motor seem dead. Turn the shaft gently by hand. It should move smoothly, without grinding or excessive resistance. Check the charger and battery contacts for corrosion, then measure battery voltage with a multimeter. I once blamed the motor too quickly; the real problem was a bent brush coupling.
Test the motor next. Set the multimeter to resistance and compare the motor terminals with the service specification. Infinite resistance may indicate a broken winding, while near-zero resistance can suggest a short. Never test live wiring unless you have proper training.
Inspect the gears under bright light. Missing teeth, cracked plastic, or black dust often reveal gear failure. Then check the spinning mechanism for a loose shaft, worn bearing, or poor alignment. Clean it carefully, and use only approved lubricant; excess oil can trap dust.
The U.S. Department of Energy’s Motor Systems Market Assessment reports that motor-driven equipment consumes roughly 68% of industrial electricity in the United States. That figure explains why small motor faults deserve careful diagnosis.
Reassemble the parts without forcing them, and run the cleaner briefly without load. Listen for clicking, uneven rotation, or heat. Not every quiet motor is healthy.
When an electric brush cleaner stops spinning, do not blame the motor immediately. I once made that mistake. A tight knot of hair had wrapped around the shaft and created a hard, silent jam. Unplug the cleaner first, then remove the brush head. Pull out hair, dust, and dried residue with tweezers or a soft pick. Wipe the shaft carefully. Moisture can also slow rotation, so let every part dry fully before testing. The U.S. Department of Energy estimates that standby power can account for 5–10% of household electricity use. Unplugging during inspection is sensible, even for a small appliance.
Try a reset after cleaning. Remove the battery or disconnect the power cable for several minutes. Press the power button briefly while disconnected. This can clear a temporary control fault, but it will not repair damaged parts. Check the coupler, drive gear, and brush socket for cracks or rounded edges. A loose coupler may look normal but slip under pressure. Replace worn components with compatible parts, rather than forcing the brush back into place. Stop if you smell burning, see melted plastic, or notice unusual heat. Safety testing under IEC 60335-1 focuses on household appliance hazards, yet everyday wear still needs user judgment. I sometimes replace parts too quickly. Inspect twice, then decide.
Remove the brush head and inspect the spindle, bristle base, and hidden grooves. Hair can form a tight ring underneath. That small blockage may stop the entire head.
Unplug the cleaner and remove its battery first. Pull debris gently with tweezers. Use a dry cotton swab and a soft, unused toothbrush. Avoid sharp blades.
Let the head dry completely. Rotate it by hand afterward. It should move smoothly, without clicking or resistance. If it sticks, inspect the attachment socket for grit or dried cleaner.
Disconnect power before testing. A trained person can measure motor resistance with a multimeter. Infinite resistance may suggest a broken winding. Near-zero resistance may suggest a short.
Inspect the gears under bright light. Missing teeth, cracked plastic, or black dust can indicate failure. A loose shaft or worn bearing may also prevent smooth spinning.
Check the battery and charger contacts for corrosion. Measure battery voltage only if you understand the meter. I once blamed the battery too quickly. The blockage was underneath the head.
Use only an approved lubricant, and apply very little. Excess oil can trap dust around the gears. More lubricant is not always better.
Reassemble everything without forcing the parts. Run the cleaner briefly without a load. Listen for clicking, uneven rotation, or unusual heat. Stop using it if its behavior seems abnormal.
If you are wondering why is my electric brush cleaner not spinning, start by checking the simplest causes. Make sure the power switch is turned on, the battery has enough charge, and the charging cable or adapter is connected properly. Next, remove the brush head and inspect it for tangled hair, trapped dirt, dried product, or other debris that could stop the bristles from moving. The brush head should also be attached firmly and aligned correctly with the rotating connector.
If these steps do not solve the problem, examine the spinning mechanism for unusual noise, looseness, or visible damage. The motor, gears, or internal connector may need attention. Carefully clean the device according to its care instructions, allow it to dry completely, and reset it if a reset function is available. If the brush still fails to rotate, replacing a worn brush head or damaged part may restore normal operation. Avoid forcing the mechanism, as this could cause further damage.
