Madame Beauty
Clean makeup brushes are essential for a polished look and healthier-looking skin. Yet many people wash them too quickly, leaving foundation trapped near the ferrule. An automatic cleaner can make this routine faster, but it cannot replace careful inspection. This guide explores seven of the best automatic cleaners for different brush sizes, materials, and budgets. It focuses on cleaning performance, drying speed, noise, ease of use, and brush protection.
The key question is how to deep clean makeup brushes with an automatic cleaner without damaging soft bristles or loosening the handle. A reliable process usually includes lukewarm water, a mild brush-safe cleanser, and the correct spinning angle. Dip only the bristles. Keep the ferrule mostly dry. Then spin the brush briefly and reshape it before air-drying. Small details matter. A dripping brush can develop a musty smell if stored too soon.
We also consider practical evidence, including user handling, manufacturer instructions, and repeated cleaning results. Some models clean dense powder brushes well but struggle with thick cream products. Others dry quickly but create more splashing around the sink. No cleaner is perfect. I initially underestimated how much manual rinsing some brushes still require. That limitation deserves attention, especially for professional kits or sensitive skin routines. The following selections offer realistic strengths and weaknesses, helping you choose a cleaner that fits your tools, schedule, and cleaning habits.
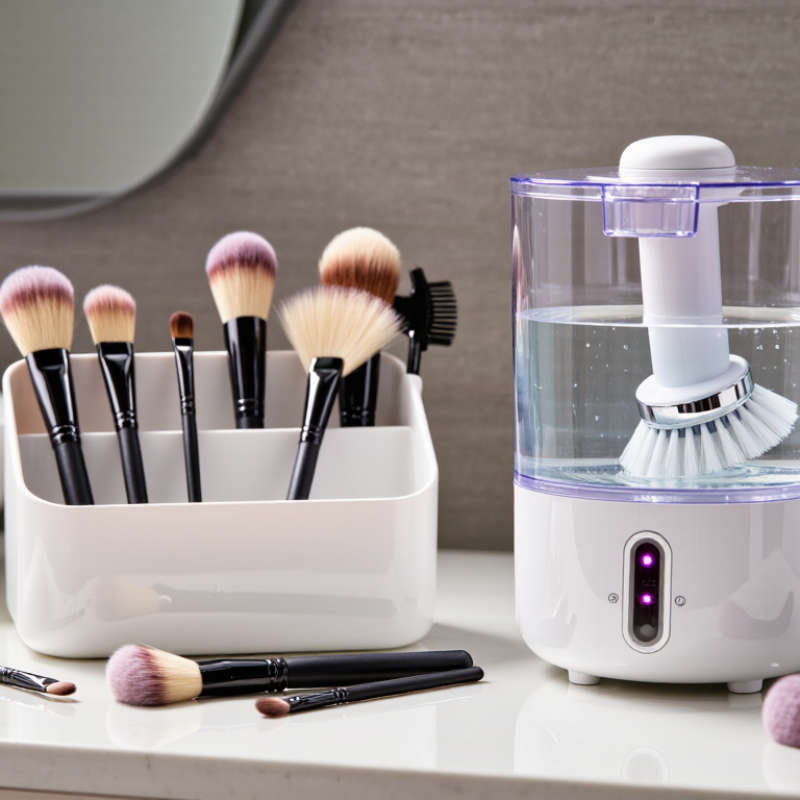
Automatic cleaners promise speed, but their designs differ. Spinner-bowl cleaners use centrifugal force, shampoo, and water to wash and dry brushes quickly. Ultrasonic cleaners create high-frequency waves that loosen foundation from dense bristles. Silicone-pad models use vibration and textured surfaces for gentle scrubbing. Rotating systems suit daily makeup users, while ultrasonic units work better for heavy, cream-based residue. UV compartments may reduce surface microbes, but they cannot replace washing.
A 2024 Grand View Research report identified hygiene devices as a growing part of the beauty-device market. However, “automatic” does not always mean hygienic. The American Academy of Dermatology recommends washing makeup brushes every seven to ten days. A cleaner should rinse away soap fully, or residue may stiffen the bristles and irritate skin. I have found that slow drying remains a weak point. Wet handles can also trap moisture.
Tips: Separate natural and synthetic brushes. Use lukewarm water, not hot water. Keep the motor above the waterline. Run a second rinse for foundation brushes. Check the ferrule after cleaning. If bristles shed, stop using that cycle. A short manual rinse still helps. Personally, I would not trust a UV-only cycle for deep cleaning. It sounds advanced, but dirt can remain underneath.lemma
7 Best Automatic Cleaners: How to Deep Clean Makeup Brushes?
How to Choose the Best Automatic Cleaner for Different Brush Types
Choosing an automatic cleaner begins with the brush, not the machine. Dense foundation brushes need stronger rotation and a deeper rinse. Soft powder brushes need gentler movement. Natural-hair bristles can become dry or rough after aggressive cleaning, while synthetic fibers usually tolerate faster cycles. A cleaner with adjustable speed is more useful than one with a single powerful setting.
Check the bowl size and collar fit before buying. Small eye brushes may need a narrow holder to prevent wobbling. Large face brushes need enough space to move freely without bending their tips. Avoid placing the ferrule fully underwater. Water can loosen the glue and damage wooden handles. Use lukewarm water and a mild cleanser, then spin the brush briefly. Longer is not always cleaner.
I once left a dense brush spinning too long. The bristles looked clean but felt stiff afterward. That mistake changed my routine. Now, I wash dense brushes in short cycles and inspect the center of the bristles by hand. After cleaning, dry brushes horizontally or with the tips pointing downward. Do not use strong heat. Automatic cleaning saves effort, but it cannot replace judgment. If a brush still feels oily, repeat a short cycle instead of forcing a harsher one.
| Rank | Automatic Cleaner Type | Cleaning Method | Best Brush Types | Typical Cycle | Drying Function | Recommended Cleaning Solution | Main Advantages | Important Limitations | Overall Suitability |
|---|---|---|---|---|---|---|---|---|---|
| 1 | Spin-Wash and Spin-Dry Cleaner | A motorized collar spins the brush in diluted cleanser and then spins out excess water. | Foundation, concealer, blush, powder, and medium-sized synthetic brushes. | About 30–60 seconds per brush, excluding setup. | Yes; centrifugal spinning removes much of the surface moisture. | Water with a small amount of gentle brush shampoo or mild soap. | Fast, widely compatible, and useful for both washing and reducing drying time. | Keep the ferrule and handle connection above the water line to help protect the glue. | Best Overall |
| 2 | Rotating-Cup Brush Washer | The brush head rotates in a removable cup while water and cleanser loosen makeup residue. | Large face brushes, kabuki brushes, powder brushes, and synthetic bristles. | About 45–90 seconds per brush. | Usually includes a spin-dry stage; air-drying is still recommended. | Cool or lukewarm water with a mild, residue-free cleanser. | Simple operation and good coverage for dense brush heads. | Very dense or heavily soiled brushes may need a second cycle or manual spot cleaning. | Best for Face Brushes |
| 3 | Low-Speed Silicone Agitator Cleaner | A soft silicone surface gently agitates the bristles while the brush is rotated or moved through cleaning liquid. | Natural-hair, fluffy, tapered, and delicate blending brushes. | About 60–120 seconds per brush. | Limited; towel blotting and horizontal air-drying are generally needed. | Gentle brush cleanser or diluted mild shampoo. | Lower friction helps preserve soft bristles and delicate shapes. | Slower than high-speed spin systems and less effective on dried waterproof makeup. | Best for Delicate Brushes |
| 4 | Dual-Speed Spin Cleaner | Uses a lower speed for washing and a higher speed for rinsing or removing excess water. | Mixed brush collections, including eye, face, synthetic, and natural-hair brushes. | About 30–90 seconds per brush, depending on soil level. | Yes; adjustable spinning provides moderate drying assistance. | Water plus a small quantity of gentle, low-foam brush cleanser. | Offers better control for different brush sizes and bristle densities. | High-speed spinning can distort soft bristles if the brush is held at an incorrect angle. | Best for Mixed Collections |
| 5 | Automatic Silicone-Pad Scrubber | A motorized silicone pad creates gentle friction to lift pigment, oil, and product buildup. | Small eye-shadow, liner, lip, and detail brushes. | About 45–120 seconds per brush. | No dedicated drying; brushes should be reshaped and air-dried. | Small amounts of mild cleanser with lukewarm water. | Precise cleaning for small heads and textured bristles; easy to rinse. | Not ideal for very large brushes, and excessive pressure may roughen natural hair. | Best for Small Brushes |
| 6 | Ultrasonic Water-Bath Cleaner | High-frequency vibrations create microscopic bubbles that help dislodge residue from immersed items. | Brush handles, removable accessories, and selected synthetic brushes with secure construction. | About 2–5 minutes per cycle. | No reliable brush-drying function. | Plain water or a manufacturer-approved, low-foaming solution. | Reaches small gaps and cleans hard, non-porous accessories efficiently. | Use cautiously: prolonged immersion or vibration may loosen ferrules, damage adhesive, or deform soft bristles. | Best for Accessories |
| 7 | Rotating-Rack Washer with Air-Dry Stand | A rack rotates multiple brushes through a cleaning bath and then holds them for upright or angled drying. | Regular-use synthetic brushes and households cleaning several brushes together. | About 3–8 minutes for a small batch. | Provides a drying stand; passive air-drying is safer than high heat. | Water and a gentle, low-residue brush cleanser. | Convenient for batch cleaning and helps keep brushes organized while drying. | Brushes should not be packed tightly; poor airflow can prolong drying and encourage odor. | Best for Batch Cleaning |
Care tip: Use lukewarm rather than hot water, avoid soaking the ferrule or handle joint, reshape the bristles after washing, and allow brushes to dry completely before use.
Before using an automatic makeup brush cleaner, prepare each brush carefully. I used to rush this step, and leftover foundation made the water cloudy quickly. Tap the handles gently against a clean towel. This removes loose powder and flakes without damaging the bristles. Separate brushes by size, density, and product type. Foundation brushes usually need more attention than powder brushes.
Check the bristles and ferrules for cracks, shedding, or looseness. Do not place a damaged brush into the machine. Water may enter the handle and weaken the adhesive. Rinse the bristles with lukewarm water, keeping the ferrule above the waterline. Avoid hot water. It can soften glue and change the brush shape. Use a mild, fragrance-free cleanser if the brush carries cream products. A short pre-rinse often helps the automatic cleaner work more evenly.
Tips: Do not overload the cleaning container. Leave space between brushes. Place dense brushes separately from delicate ones. If a brush still feels greasy after cleaning, repeat a shorter cycle instead of adding excessive cleanser. Dry brushes horizontally with the bristles extending beyond the towel’s edge. I sometimes forget that drying takes longer than expected. Patience matters here. Never store damp brushes in a closed case.
Deep cleaning makeup brushes automatically works best when the machine matches the brush material.
Seven useful options include a spinning cup cleaner, silicone agitator, ultrasonic bath, enclosed spray washer, rotating rinse bowl, portable electric cleaner, and brush-drying station. Each method uses different water pressure, movement, or drying time. Natural hair needs gentler treatment than dense synthetic fibers.
Start by separating brushes by size and hair type. Add lukewarm water and a mild, fragrance-free cleanser to the device’s container. Do not soak the handle or ferrule.
Place one brush into the holder, then run the shortest cleaning cycle. Watch the water turn cloudy. That detail shows product buildup leaving the bristles. Rinse until the water looks clear.
Now inspect the brush with clean hands. Press the bristles lightly against a towel, then reshape them.
Use the drying function only if it keeps the brush angled downward. Heat can weaken adhesive over time. My own routine is not flawless. I sometimes choose a cycle that is too long, especially for thick foundation brushes. A manual rinse is still necessary when residue remains near the ferrule.
Let brushes dry completely in open air before storing them. Clean the device after each session, because leftover cleanser and makeup can contaminate the next load. This small step matters.
Automatic makeup brush cleaners can shorten washing time, but deep cleaning still depends on careful technique. I remove visible residue before placing each brush into the device. Start with lukewarm water. Hot water may weaken the adhesive inside the ferrule. I use a gentle cleanser and keep the handle and metal joint mostly dry. The rotating action reaches the dense center, though one short cycle may not remove cream foundation completely.
Cleaning removes makeup and oils; it does not guarantee disinfection. After rinsing, I apply a cosmetic-safe disinfectant only when the brush material allows it. Follow the product instructions carefully. Never mix cleaning solutions. I allow the disinfectant to remain for its stated contact time, then rinse when required. A clean brush still needs proper drying. I press out water with a fresh towel and lay the brush horizontally, with the bristles extending beyond the edge. This prevents moisture from collecting inside the ferrule.
I once rushed this stage and stored damp brushes in a closed container. They developed a stale smell within days. That mistake changed my routine. I now use gentle airflow and avoid direct high heat, which can harden or split bristles. Brushes used around the eyes deserve extra attention. Inspect them weekly for shedding, cracks, or unusual odor. Wash storage cups regularly, and avoid touching clean bristles with unwashed hands. My routine is not flawless, especially during busy mornings, but noticing small failures makes maintenance more reliable.
A practical cleaning schedule: brushes used with liquid or cream products should be cleaned after each use, while eye and powder brushes should be washed at least weekly. After washing, remove excess water, disinfect only with a brush-safe product, and dry brushes horizontally with the bristles uncovered.
Tap each handle gently against a clean towel to remove loose powder and flakes. Separate brushes by size, density, and product type. Foundation brushes may need extra attention. Do not rush this step.
Inspect the bristles and metal joint for cracks, shedding, or looseness. Do not clean damaged brushes in the machine. Water may weaken the adhesive inside the handle.
Use lukewarm water. Avoid hot water because it may soften glue and distort the brush shape. Keep the metal joint above the waterline during rinsing.
Yes. Remove visible powder, flakes, and cream residue first. A short pre-rinse helps the machine clean more evenly. Heavy foundation may require a second, shorter cycle.
Avoid overloading the container. Leave visible space between brushes. Keep dense brushes separate from delicate ones. Crowding reduces cleaning movement.
Cleaning removes makeup and oils, but it does not guarantee disinfection. Use only a cosmetic-safe disinfectant suitable for the brush material. Follow its contact time carefully. Never mix cleaning solutions.
Press out water with a fresh towel. Lay each brush horizontally, with the bristles extending beyond the towel’s edge. Use gentle airflow instead of direct high heat. Patience helps.
Trapped moisture can create a stale smell within days. It may also encourage poor brush hygiene. Let brushes dry completely before storage. I still forget sometimes.
Inspect eye-area brushes weekly for shedding, cracks, or unusual odors. Wash storage cups regularly. Touch clean bristles only with clean hands. Small habits matter.
This guide explains how to deep clean makeup brushes with an automatic cleaner by comparing common cleaning systems, including spinning, vibrating, and washing-and-drying models. It shows how to select the right cleaner for different brush materials, sizes, and shapes while avoiding excessive moisture or friction that may damage delicate bristles. Before cleaning, readers will learn to remove leftover makeup, separate brushes by type, and prepare the appropriate cleaning solution and water level.
The step-by-step process covers securing each brush, choosing a suitable cleaning cycle, and checking whether the bristles are thoroughly rinsed. It also explains how to dry brushes correctly, disinfect them safely, and prevent moisture from reaching the handle or ferrule. Finally, the guide offers practical maintenance advice, such as cleaning the device regularly, storing brushes in a ventilated place, and repeating the process often enough to keep brushes fresh, hygienic, and ready for comfortable application.
